Chess lessons › Famous chess games
Kasparov’s Immortal
Two rooks are given up in a king hunt that runs the length of the board.
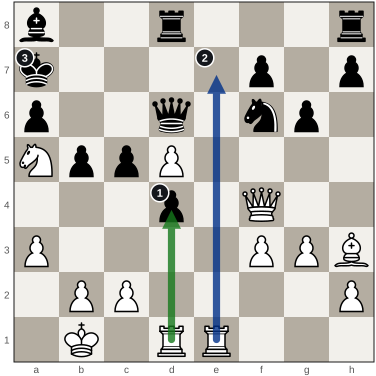
The idea
Kasparov offers both rooks and chases the king across the board.
- Kasparov gives up a rook for a pawn, and Black takes it.
- Then the other rook checks here and is offered too.
- The king runs, and the queen and pawns chase it across the board.
In a game: When the enemy king has few defenders, look for sacrifices that drag it out.
How the lesson begins
Garry Kasparov played Veselin Topalov at Wijk aan Zee in 1999. The game is often called Kasparov’s Immortal. White gives up two rooks to pull the black king from the queenside across the whole board.

In 1999 Garry Kasparov played White against Veselin Topalov at Wijk aan Zee. Black plays the Pirc Defence. White answers with Be3, Qd2 and f3, and then trades the dark-squared bishops with Bh6, which brings his queen to h6.
- 1. e4 d6 2. d4 Nf6 3. Nc3 g6 4. Be3 White develops the bishop to e3.
- 4... Bg7 5. Qd2 The queen goes to d2, so the bishop can go to h6.
- 5... c6 6. f3 b5 7. Nge2 Nbd7 8. Bh6 The bishop offers a trade of the fianchettoed bishops.
- 8... Bxh6 9. Qxh6 The queen is on h6, close to Black’s king.
- 9... Bb7
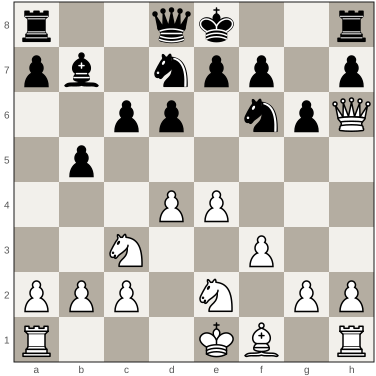
Both players castle on the queenside. Black opens the centre with ...exd4 and ...c5 to gain space, and White’s knight goes to a5, near Black’s king. 19.Bh3 aims the bishop at the queenside, and 20.Qf4+ drives the black king to a7.
- 10. a3 e5 11. O-O-O White castles on the queenside.
- 11... Qe7 12. Kb1 a6 13. Nc1 O-O-O Black does the same.
- 14. Nb3 exd4 Black opens the centre.
- 15. Rxd4 c5 16. Rd1 Nb6 17. g3 Kb8 18. Na5 The knight goes to a5, near Black’s king.
- 18... Ba8 19. Bh3 The bishop looks at the queenside.
- 19... d5 20. Qf4+ The queen checks.
- 20... Ka7 The king goes to a7.
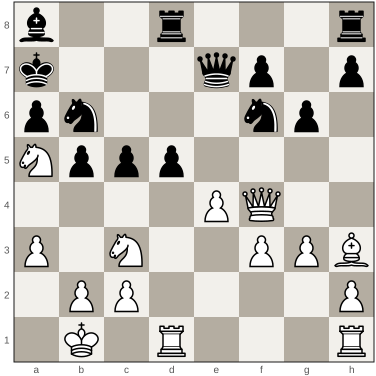
Kasparov brings the rook to e1, facing Black’s queen. Black pushes ...d4, and 22.Nd5 offers a trade of knights: after 22...Nbxd5 23.exd5 the e-file is open and Black’s queen has to move to d6.
- 21. Rhe1 The rook comes to e1, facing Black’s queen.
- 21... d4 Black’s pawn attacks the knight on c3.
- 22. Nd5 The knight jumps to d5 to be traded.
- 22... Nbxd5 23. exd5 The pawn takes back and opens the e-file against the queen.
- 23... Qd6 The queen moves out of the way.
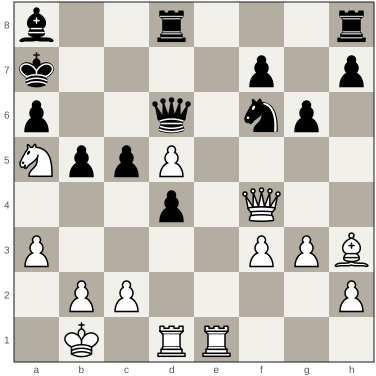
Find the move
It is White’s move. The black pawn on d4 is attacked, but White has something far stronger. Find the rook sacrifice on d4.
A hint
Give up a rook on d4.
Show the answer
24. Rxd4
Rxd4!! Black takes the rook, and White follows with a second rook sacrifice on e7. The calculation behind it ran for many moves.