Your first game, move by move
Play through the start of a game and find the good moves yourself.
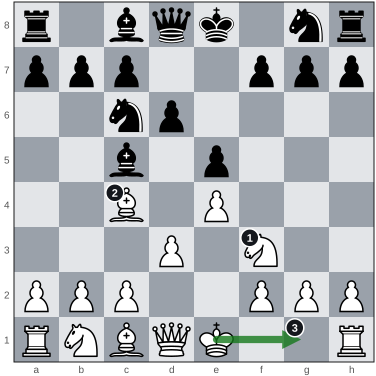
The idea
Bring your pieces out, castle early, and take what is left hanging.
- The knight is out, aimed at the centre.
- The bishop is out too, aimed at Black’s side of the board.
- Castling puts the king here, safe near the corner.
In a game: In the opening, bring your pieces out, castle, and never leave one hanging.
The lesson
Here is the start of a game to play through, move by move. At a few points you will find the move yourself.
The centre is the four squares in the middle of the board: d4, e4, d5 and e5. White has started with the pawn move e4. Both sides go on by moving a pawn and a knight towards the centre.
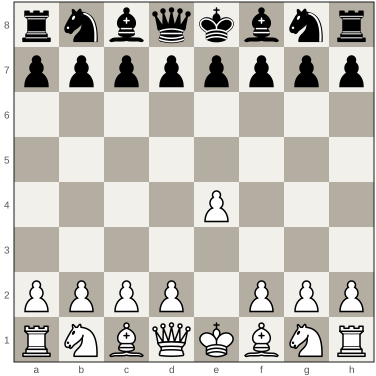
- 1... e5 2. Nf3 Nc6 3. Bc4
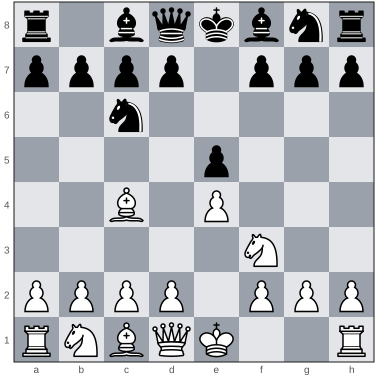
White has brought out a knight and then the bishop from f1, which now aims at Black’s side of the board. Bringing a new piece into play is called developing it. Getting your pieces out early is one of the best habits in chess.
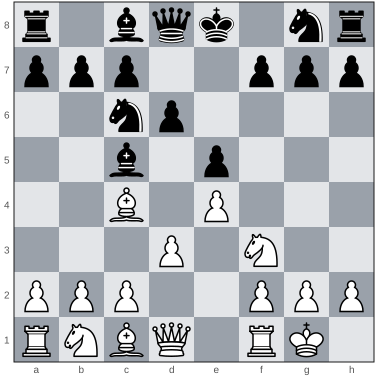
Black brings out a bishop too, to c5. Then each side moves a pawn one square, to d3 and d6. Now the other bishops can come out as well.
- 3... Bc5 4. d3 d6
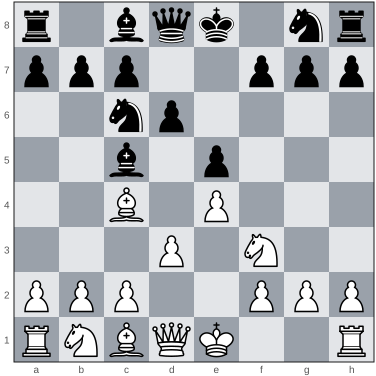
Find the move
White’s king and the rook on h1 have not moved, and the squares between them are empty. Put the king in a safe place in one move.
A hint
Move the king two squares towards the rook on h1.
Show the answer
5. O-O
O-O is castling. The king moves two squares towards the rook, and the rook jumps over the king to the square next to it. The king is safer near the corner, behind its own pawns.
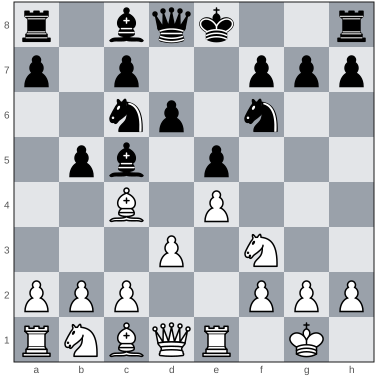
Black brings out the other knight, and White moves a rook to e1. Then Black makes a mistake. The pawn goes to b5, where nothing guards it.
- 5... Nf6 6. Re1 b5
Find the move
Black’s pawn on b5 is hanging: no black piece or pawn guards it. Take it.
A hint
Which white piece attacks b5?
Show the answer
7. Bxb5
Bxb5 wins a pawn, and Black cannot take the bishop back. When the other side leaves something hanging, take it, but first check that it is safe.
White is a pawn ahead, and the white king is safe. Our game stops here.
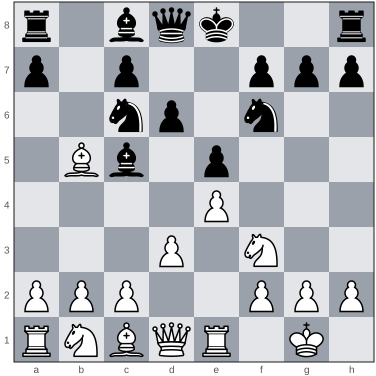
Many games end with a mate. The last position is not from this game. It shows a mate every player should know.
Find the move
The black king is on its back rank, the row it started on. Its pawns have never moved. Find the checkmate.

A hint
Look at the row behind the king’s pawns.
Show the answer
1. Ra8#
Ra8# gives check along the back rank. The king’s own pawns on f7, g7 and h7 block it in, and the rook covers f8 and h8. Nothing can take the rook or get in its way.